
Start Guide
When you first get your Pipes
Okay, you’ve unpacked everything, and you just want to strap them on and get going. Just a moment! Take a deep breath and do a couple things first. The pipes have had a harrowing adventure of a time in the mail. They’ve been cold and dry, or hot and humid (or more likely both) and they might need some attention from you before they’re back in the tip-top shape they were in when they left the shop.
First, the joints.
Make sure that the bottom sections of the drones are not too loose in the drone stock. If they are too loose they may be loosing air, or might pull out of the stock when you try to tune the drones. If they are loose, add hemp or thread. As long as the thread isn’t too thick, you can also use whatever you fancy. Sewing thread is a good choice. Just be careful, the waxed hemp sold at highland pipe supply shops, and even the unwaxed yellow stuff, is often too thick for these littler pipes. You want to be able to get those drones back out; so don’t use too much hemp. For these joints you can beeswax your thread to help it stick, or use pre-waxed thread like the .020" polycord from here (this is what I use on all non-sliding joints). And remember to add the hemp evenly over the surface of the tenon, or the drone can be tight in the drone stock, but still wobble.
The joints that slide to tune the drones don’t need to be as tight. They need to be just tight enough to prevent the drones from sliding while you play. My current favorite “hemp” for sliding joints is actually silk. I like size “D” which you can get from many places online including Amazon. The silk thread allows the slides to move smoothly, but if you want a slicker slide, add cork grease (available at all music shops). I also like the stuff that the Bore Doctor makes.
Also make sure that the chanter top is securely on the chanter. If it pops off while playing, your reed could get damaged. And make sure that the top is nice and tight inside the metal stock that is tied into the bag. Check that the bellows connections all have enough hemp including the blowpipe. As these are all non moving parts, beeswax is a good idea.
If you have an A or an A/D smallpipe set, please note that the bass A and the bass D (also known as the baritone) bottom sections are very similar in length. If you take them apart and forget which is which, the baritone bottom is the longer of the two and has a longer pin. Also remember that the Baritone top (for E/D) is the longest top, not the bass A.
If the set was ordered with integral drone shut-off ends (or “Stop Tops”) check to see they slide easily. They should be working perfectly when you first receive the pipes, but just in case, and for future reference: They need to be properly lubricated to work. If they are sticky, loosen the set screw (you don’t need to remove it entirely) with the allen wrench provided. Carefully pull off the stop top, and apply a small amount of Vaseline into the hole where the plunger goes into the drone. Replace the end, moving it up and down to spread the Vaseline, then make sure the set screw lines up with it’s channel. Carefully tighten the set screw. As soon as you feel the screw touch the bottom of it’s channel, stop (going too far could crack the drone). You may need to back off the screw slightly to allow the shut-off end to slide freely. Now move the drone end up and down again to further work the lubricant around. Later, if a Stop Top starts leaking air, add Vaseline, this will solve the problem (should only need this once a year or less).
Now the Chanter Reed(s)
The drone reeds are shipped in the pipes ready to go, but the chanter reeds, which are much more fragile, are wrapped up in tissue paper in the chanter tops. Carefully remove the chanter top and remove the tissue paper from the reed before playing. (If you need to ship the pipes at some point, do not just leave the chanter reeds in the chanter. If they fall out they can be ruined during shipping. Wrap the reed in tissue, or separately in a box.) Make sure the reed is seated in the chanter straight up and down to prevent it from hitting the inside edge of the chanter top. Now very carefully replace the top making sure not to catch the corners of the reed.
If this is a set of Border pipes, please note that despite the reed and the chanter looking like little versions of a GHB reed and chanter, the reed goes further into the reed seat than it might on a GHB chanter. Don’t be afraid to really push that reed down into the chanter. I’ve made the top of the chanter a little extra long to allow for a longer hemp area to keep the chanter in it’s top more securely, so the reed does need to be pushed pretty far in.
Plug the chanter top into the metal chanter stock that is tied into the bag. Now the pipes are almost assembled.
RightHand Thumb Hole
– Unless you requested us not to include one, there is a righthand thumb hole. This is to play the minor third. On an A chanter that would be Cnat. This hole can be taped over if you wish not to use it at first. It does take a bit to get used to, but it also gives you loads and loads of extra tunes you would not have otherwise been able to play. To use this note, finger a B and lift your right hand thumb.–
Bellows
Set the pipes on your lap. Now strap on the Bellows. The rule of thumb is to play the bellows as high up on your waist as they’ll go comfortably. This can be anywhere from almost in your armpit, to way down on your hip (though that is probably a bit low). Also, they need not be overly tight. Slide your right arm (if the set is for righties) into the arm strap and tighten. It must be above your elbow. Now attach the bellows to the bag with the blowpipe.
If this is your first bellows experience, make sure all the drones are switched (or corked) off. You may now start pumping away.
Proper bellows technique allows for maximum comfort and ease of play. Remember the principles of what you are trying to accomplish. The reeds play at a certain pressure. That pressure is maintained by the pressure you supply from your arm on the bag. The bellows is there only to refill the bag as it is depleted. When you are pumping with the bellows, you must compensate for the extra pressure from the bellows by squeezing less hard with your bag arm. Allow the air from the bellows to enter the bag and cause your bag arm to rise with the bag.
The advice that sticks with people best is to remember to make sure you are completely filling the bellows on the upstroke before starting the down stroke. Start the upstroke as soon as you are done with the down stroke, but do this in a fluid, non-jerking way. It all should be happening slowly. Slowly down to fill the bag and not quite as slowly back up and then down again, a fluid rocking motion.
Start by playing and holding the tonic note (low A or D) of your chanter while practicing your bellows technique. It helps to do this in front of a mirror. After you can hold it steady (not wavering in pitch) you may want to add one drone to see if you can hold them in tune together. If you can do this, shut off the drone and try a simple tune. Get comfortable with your bellows before adding more than one drone. And remember that only perfect practice makes perfect.
—
The bellows tube must be the right length for you. When you receive it, it may be too long. If, when you try playing the pipes, the tube is not obviously too long, wait before adjusting the length. I would very much caution patience with cutting the blowpipe, only because, depending on how the pipes are held, the length needed for the bellows connector will change. So I'd say make sure that you are happy with how you are holding the pipes before any changes are made to the length.
When I started playing bellows, I needed a shorter bellows connector. And as I got more comfortable I started opening up my chest and straightening my back. Changing how I held my body greatly increased how long I needed the blowpipe.
That said, once you're fairly certain, you can definitely go ahead and cut the tube.
-The most straightforward way: You can just start snipping a bit off of the end where it connects to the blowpipe. You will lose that decorative knob on the end of the tube, but if you don't care about that then easy peasy.
-If you do want to keep the little decorative knob on the end, and you only need a little bit cut off, you can untie the metal screw part from the other end, slice a little off of that end, and then retie it. That way you will only lose the decorative bit on metal screw end which is much less obvious.
-If you need a lot cut off, then you can untie the metal screw bit, then cut a lot off of the original blow pipe connecting end, and retie the metal bit on that opposite end. (This would only be for people of a small build)
All these are good options, and the tube will still connect well to the blow pipe.
A good option if you want to try out a shorter blowpipe connector before cutting the tube you have, is you can untie the metal screw end, go to a hardware store, and buy some tubing that it fits the metal screw piece. With this you can experiment to find the right length before cutting the tube that goes with your pipes.
My advice when cutting the tube is to cut a small piece off but leave it still a bit too long, as you may adjust your playing posture as you become more familiar with the bellows. Then you can cut again after a month or so of playing if the tube is still too long
Bag Neck
Just a quick word about the bag. We're currently using a style of bag we started making in 2014. It's seamless in that there is no rivets or sewing seam to it. So there is no annoying hard ridge which can often irritate the forearm and increase risk for carpel tunnel or other syndromes. But it may not be obvious where to bend the neck over to play the chanter. It's intended to go like this:
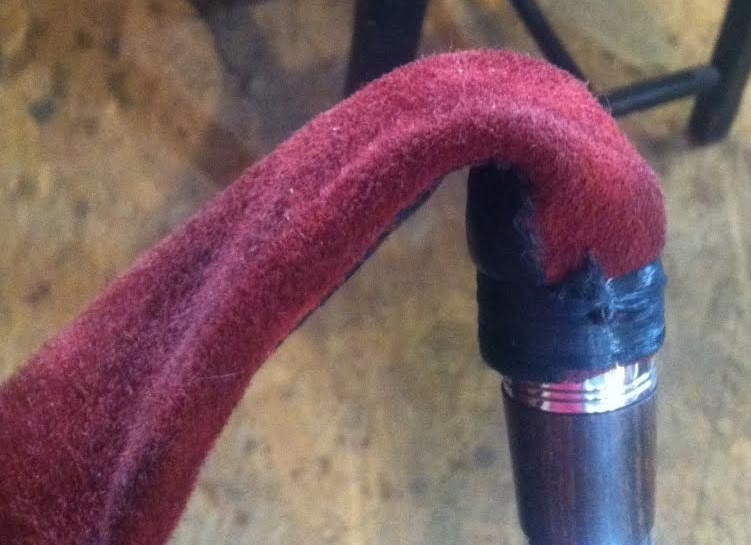
But not like this:

The latter fold will tend to cut the bag off more possibly choking the chanter causing it to not sound. If the seam is under the fold it works better. The bags also break in a bit and if you find that over bending the neck causes the chanter to also choke, this will likely go away as the bag becomes more flexible from breaking in.
—
Tuning Drones
If you’re ready for drones and you’re playing an A chanter, start with a tenor A drone, and a D tenor (“alto” drone) if playing the D chanter. If this is your first drone experience, try tuning your drone with an electronic tuner first (I squeeze the neck of the bag to shut-off the chanter to make this easier). Now try playing the chanter. You may need to adjust your pressure to come into tune with the drone. If, when you play your bottom A (or D) with the drone and it is in tune, but the top A (or D) is not in tune, adjust the reed accordingly (see Maintenance Section -coming shortly).
If you have progressed past the one drone at a time level, here are some drone options to try. This will mostly apply for the A/D combo sets, which have a great many drone tuning options.
Eighty-Five percent of my playing is done with tenor and bass only. This allows almost all key signatures to sound great and the ability to switch key signatures as you play.
The next most common thing to do is play with a baritone drone. — For A smallpipes that means tuning the second longest drone up to an E. This sounds great with tunes in A or A minor.
Or, instead, you can add an alto drone. This is standard on border pipes (smallest drone) and it’s the smallest drone on an A/D set of smallpipes. (single key/chanter (three drones) smallpipes will likely not possess this drone)
Also you can play the baritone or alto down a full step. (For A Smallpipes this would be to D.) Many tunes in D sound great with this combo. But I find only some tunes work well with this set up. Experiment.
You can also play the A chanter with the A tenor drone tuned to B for tunes in B. (or G if you requested that option)
One of my favorite “abnormal” drone tunings is to tune both the alto and baritone drones to D, turn off the tenor and bass drones, and play in D with the A chanter.
As I’ve said, there are a great many options available with the A/D combo set. Try them all. And send me mp3s of what you like!
Starting in around 2018 we managed to get our drones to exhibit a phenomenon called phase locking. If you’re not familiar with this and how to deal with it when tuning I recommend watching this video:
Quick note on Border Chanters
The Border chanter’s ability to play accidentals like Fnat and Cnat also makes playing the chanter, when you first start, somewhat frustrating. Fingering must be precise and accurate to play in tune and without squeaks. Border chanter design has come a long way in the past twenty years, and they are much less squeaky these days, but you still need to cover those holes properly.
Squeaks are caused by not properly covering the holes, especially going from high A to low A or G. Also, false fingering, especially on the E, will make Eflat or other false notes occur. I’ve also noticed beginners often don’t cover the B properly and it makes them think the low A is too sharp. Another beginner thing to do is to allow the bottom of the chanter to come too close to one’s leg (if sitting). You can actually change the pitch of the bottom notes if you are partially covering the exit hole of the chanter, or the low g vent holes.
Also, it is recommended by most Border pipe instructors that to reduce the chances of squealing, the use of the High G grace note should be minimized or eliminated when playing Low A or Low G. It is the general rule of thumb for most other lower pressure bagpipes, and indeed most wind instruments to grace with a note close to the note being graced, for example using E or C to grace Low A.
It will probably be difficult to not squeak at first, but after a few weeks you’ll realize the squeaks are almost completely gone, and after a year you won’t know why in the world you were squeaking in the first place.
You might also notice a piece of wire in the chanter with poster putty on it. This is called a “rush”. It’s a piece of bagpipe technology from the uilleann pipe world. It has two uses: One, adding "tac" to the wire will lower the pitch of the note in the area to which it is added, while removing the "tac" does the inverse. And two, it’s presence reduces the overall volume of the chanter somewhat.